Skip the awkward fin, seaweed hair and salty water -- do the nails!
The mermaid manicure is entirely appropriate for summer, trendy or not, and I’ve come across some really “fishtastic” examples lately. The beauty about this mani is that there are a few different ways to do “mermaid” nails. The underwater maiden style that I focused on creates a look of shimmering scales and goes great with water!
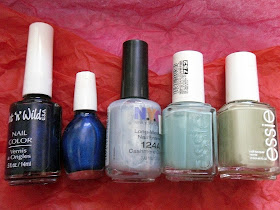
You will need four to five different types of blue- and green-toned polishes. Feel free to add in an accent color as well -- I chose bright green for mine. You can really use any colors you’d like for whatever mermaid style you’re feeling at the moment!

Start by painting your nails with two coats of the darkest blue you have, and let them dry. Next, go through each color and place a dot of polish along the nail, starting at the top.
The dots are the hardest part because you want to make them all the same size if possible. My dots sort of ended up all over the place, so it really helps to have a steady hand with this one. I found that it also helped to knock off excess polish along the neck of the bottle and then drop a dot of color on my nail. Each successive row of dots has to overlap the last one, just like fish scales!
There are as many ways to dress up this “nail-do” as there are fish in the sea. You can try adding glitter, making bigger scales, or adding microbeads on some nails for a caviar effect to create the most mermaiden mani of all.
For further inspiration, check out...
A mermaid manicure that is less time-consuming, but still perfect for summer...
A mermaid manicure that uses different colors...
A mermaid ombre fit for an under-the-sea princess...
Check out our post on how to ombre your nails if the mermaid ombre is something you like.
Now you have some fancy fingers to complement that glowing tan. I hope these nails inspire you to dive into summer and spend some relaxing days by the water!
By: Audrey Prisk | Images: Audrey Prisk


No comments:
Post a Comment